Monday, January 20, 2014

Basting with Boards?

Have you heard of basting a quilt with boards?  I hadn't until I found an online tutorial.  My initial reaction was that it would be cumbersome, bulky and fussy.  Nope, it is not.  Quite the opposite.

Board basting.  Who'd of thunk it?  Certainly not me.  I learned this method by watching a tutorial by Sharon Schamber on YouTube.  It explains the process very well.

Using boards to baste the three layers of a quilt appealed to me because:  1) No crawling around my floor stitching from center outwards in every direction.  2)  Save on lower back strain by not have to be bent during the basting process.   3)  No twisted body contortions trying to reach center.  4)  No shifting of fabric while attempting to baste the whole quilt while spread out.  5)  Reduces the chance of unforeseen puckers and loose fabric as all three layers are held down by the boards.

Following are the steps that I took.  Please note there is more detailed information on Sharon's video.

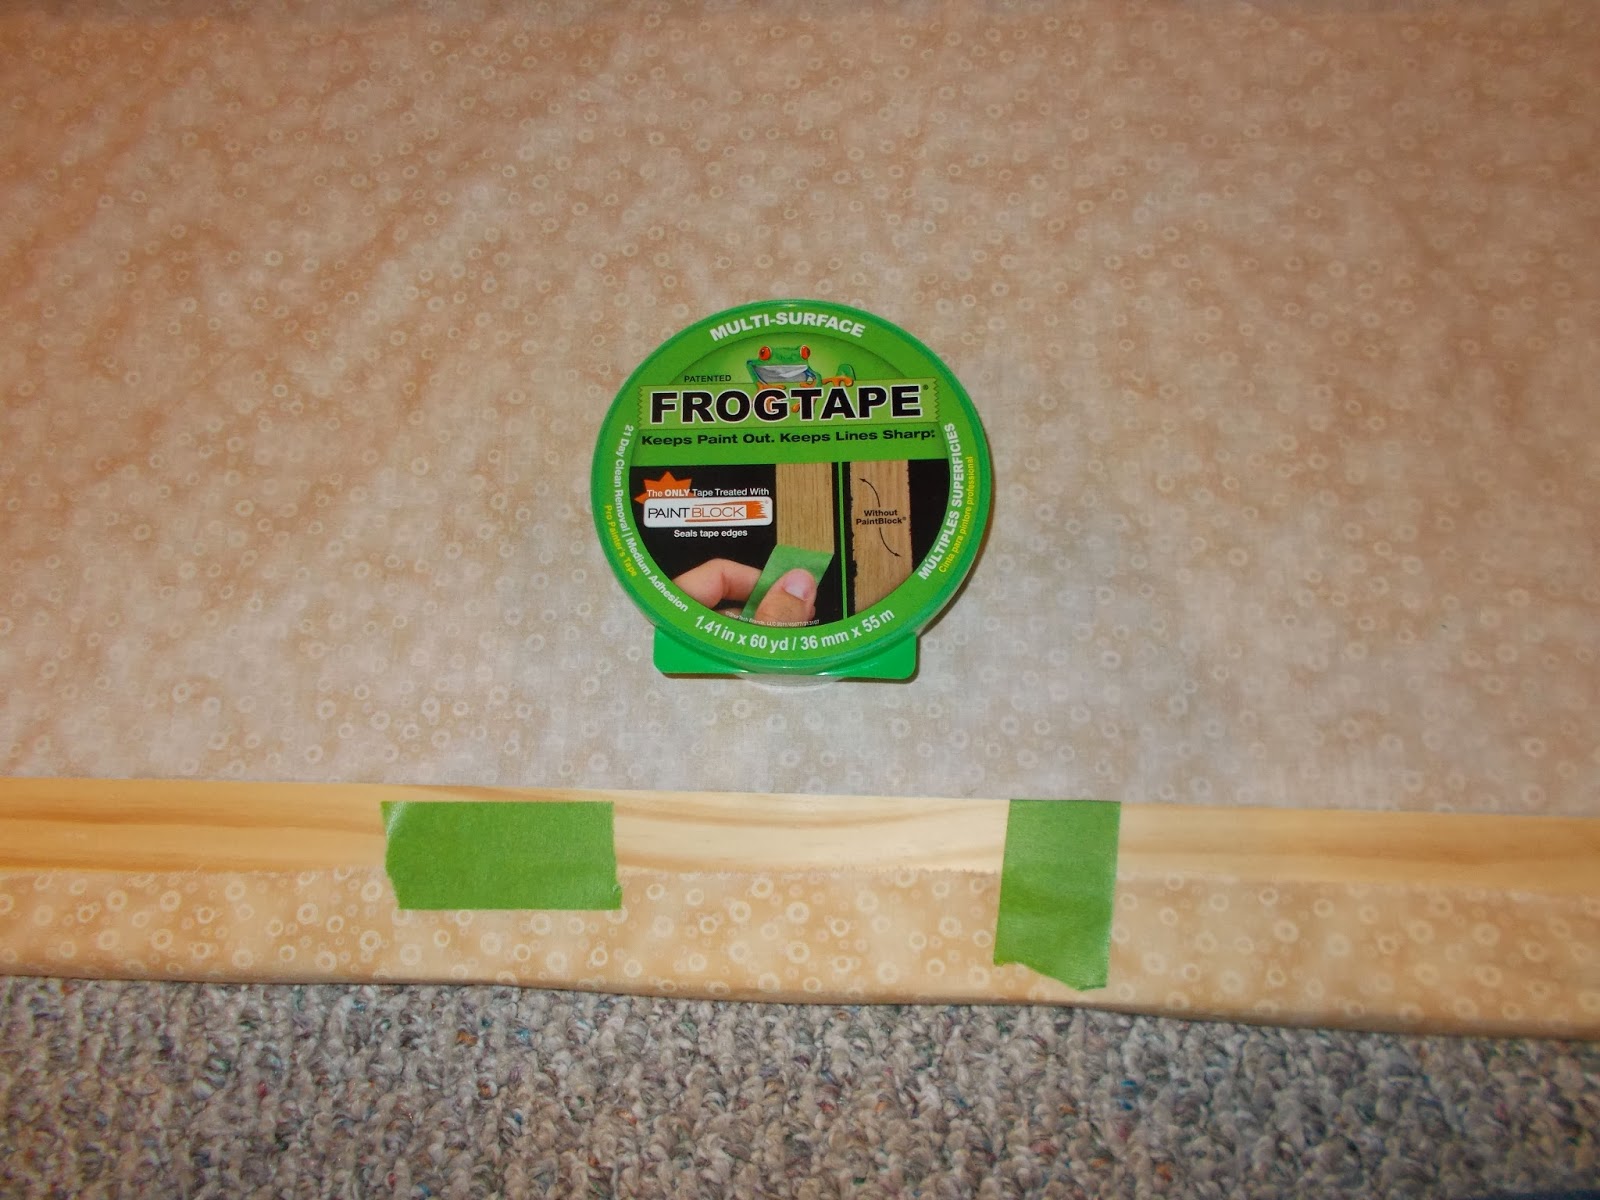
1.  I purchased two 1" x 3" trim board with a length five to ten inches longer than backing.  Made sure they were straight, cured and/or painted. Mine were purchased at Home Depot for approximately ten bucks for the pair.


2.  Back (previously pieced, starched and cut to size) was laid out face down on a flat surface which at my house is the basement floor.  Top was centered on top of backing with fabric face up.  No batt just yet:


3.  One board is placed horizontally along the bottom edge of quilt top. I used painters tape to adhere fabric to the wood for a smooth start on wrapping the fabric on board:


4.  Second board is placed horizontally along the bottom edge of backing.

5.  Begin to roll up board with quilt top holding the fabric taut as you roll for approximately 12-16 inches:


6.  Begin to roll up board holding backing. Again I used painters tape to adhere fabric along wood. This board was rolled up 12-16 inches to meet the first board:


7.  Both boards were rolled up in tandem in increments of 12 to 16 inches.  I found that the weight of the first board in keeping the back fabric weighted down thus taut:


8.  Board with back fabric was then turned around and placed on my pushed together tables:


9.  Unrolled board with back (right side face down) for approximately 12-16 inches.

10.  The batt was then placed on top of back. Batt is laid out flat and spread on table.

11.  The board with quilt top was then placed on backing and unrolled 12-16 inches:


Just like a quilt sandwich:
  • Bottom layer is the back (right side down)
  • Middle layer is the batt
  • Top layer is the quilt top (right side up)

12.  Begin the basting process in a herringbone stitch working right to left or left to right, whatever your preference.  As I basted each section, I then pulled quilt down and unrolled another 12 inches or so of the fabric on both boards. Bottom board goes underneath the batt.  Top board goes above the bat.  It all stays together with perhaps minor smoothing of fabric:


That is it!  All three layers of the quilt sandwich stay reasonably smooth and taut during basting.  I was able to sit comfortably and baste in horizontal sections of the quilt.  I found it to be more manageable and relaxing than having to be bent over while basting from center out in all different directions.

All three layers held together nicely with the boards.  Below is a view on the last section to be basted.  Note the fabric is still taut and all three layers stay together:


The outcome was one of my best basted quilts:  


Now basted quilt fits nicely into my Q-Snap quilting frame and I can begin to hand quilt any section that I desire as all layers are well secured.


Other items that I found beneficial:
  • extra tables pushed together to support quilt (card table, portable table and my secondhand cutting table)
  • spray starched (non-aerosal) the backing fabric
  • pearl cotton #8 for basting (snuggles nicely with all layers)
  • good needle threader that would accommodate the pearl cotton
  • thimble
  • good lighting
  • chair with back support and preferable one with wheels
If you are satisfied with traditional basting and never try this method, at least consider basting with #8 pearl cotton.  It is smooth, easier to handle than thread, holds the layers nicely together and it still allows for fabric movement.   

If this post has peaked your interest and are considering this method, here is the link once more to Sharon's basting tutorial.

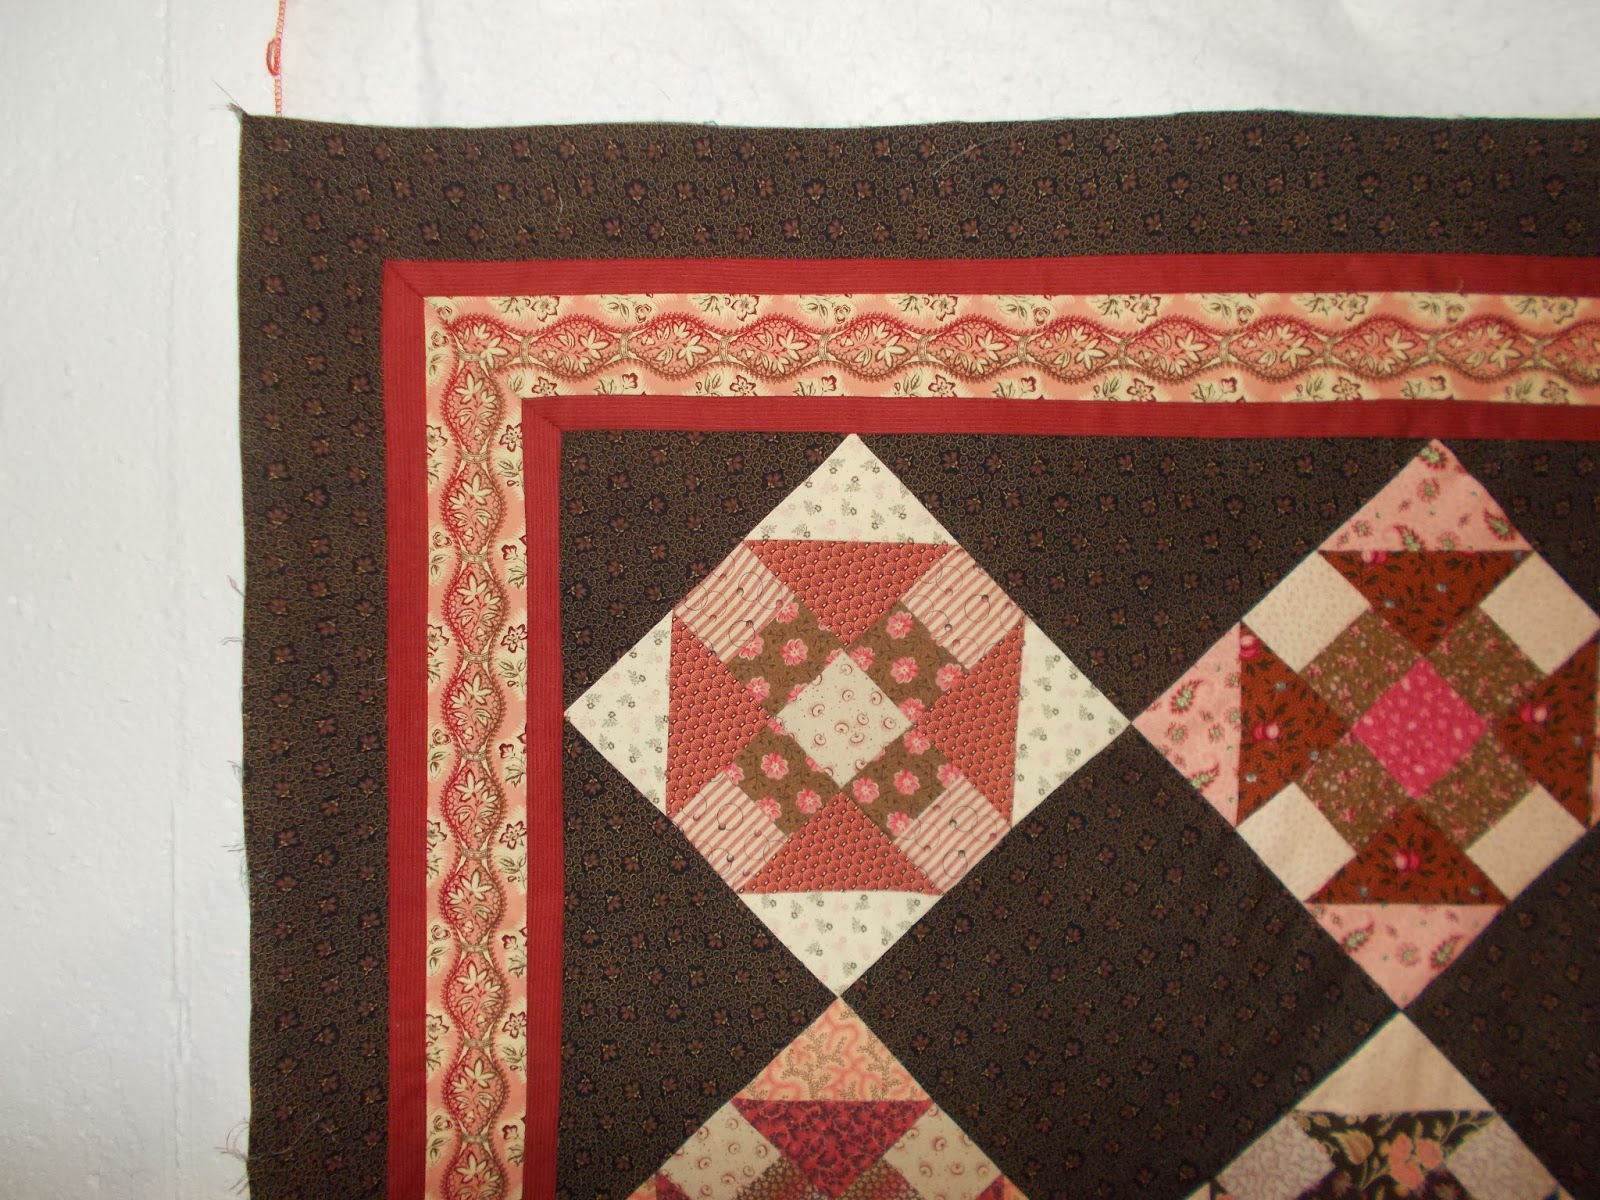
Now that the basting part is over and the quilt is in the frame, I can now link up to Kathy's popular Slow Sunday Stitching as I was finally able to begin hand quilting my Civil War Era repro quilt on Sunday.  Yay!


Sunday, January 12, 2014

Knitted Bunny

Today I look forward to beginning a new hand knit project.  I have not knitted in many years, but this super cute girl bunny has tempted me to pick up yarn again:


I first saw knitted bunnies on a Quiltsalott posting.  My reaction was "Aw, too cute."  I was curious and followed the link to Little Cotton Rabbits and was smitten with all the bunny rabbits. It was easy to purchase and download the pattern.

Next was a trip to a local yarn store (the brick and mortar variety) and a refresher knitting demo on YouTube, and I am ready to start clicking those needles.


Since I haven't knitted in years, I had no supplies not even a scrap of yarn.  Therefore, the initial bunny will not be inexpensive although the pattern itself is an excellent value.

It is amazing that I can purchase a pattern from across an ocean and have it printed in full color within seconds.

I am grateful to have discovered Kathy's Slow Sunday Stitching weekly linky party as I am a slow stitcher. I need to start my knit stitches in January to be completed by Easter.


Monday, January 6, 2014

Design Wall Ta Da!

Quilt top is finished and ready to be removed from the Design Wall. Finally! It took longer than I had anticipated, but I presevered.


Mitered borders were manageable.  Due to having one patterned print and three other fabrics in the border, the process was a bit more tedious.  Many quilters do not precut mitered borders prior to sewing to quilt. However, I did precut them with the 45 degree angle thus making the fabric easier to handle with less bulk. Note, there were triple checks of pre-measuring prior to cutting.

I learned this method on an excellent YouTube video  by Deonn Stott and Cindy sponsored by Riley Blake Designs.  It was very beneficial. I was hoping to have flowers meet at the exact angle, but I was unable to pull that off.  I did decide that
having the miters meet and lay flat was good enough for me. The overall look of the mitered design suffices.

Batting has been ordered. A shirting fabric for the backing was purchased at a local quilt store.  I hope to begin basting this week.

I live in the half of the country that is affected by the Polar Vortex, thus it felt good to stay in and sew.  Did you stay in and sew due to the dangerously frigid temperatures?

View from Quilting Dreams in Marine City, MI
US Coast Guard Ice Cutter keeping the St. Clair River open

This will be the last Monday that this quilt, "Tara," (don't hold me to the name) will be posted on Judy's Patchwork Times Design Wall Mondays. Please check the others out.  There are many pretty ones posted this week.