Showing posts with label Slow Sunday Stitching. Show all posts

Sunday, March 1, 2020

Quilt Basting

Two needlework projects this week. Easy background fill-in needlepoint on London of which I am enjoying immensely.

Secondly, there was prep work for board basting (not bored 😉)  the Red & White (RW) quilt which will later be machine quilted on my domestic.


This is the third quilt that I have done board basting which I learned from Sharon Schaumber's youtube video.  The boards give the three layers a nice weight and tension. You unroll the boards and baste each section as you go along. Sharon does an excellent job of explaining the process and reasons. Click here if interested in this method. I have set up a spare table in the guest bedroom which has natural daylight and a TV which keeps me from getting bored while board basting. 😉


The batting / wading is spread out on the bed in between the backing and top. Perhaps you can see the smoothness of the quilt which helps avoid potential puckers while basting. Many quilters use safety pins to baste. I prefer needle and thread. It goes quickly while working at table height.


There are other kindred stitchers linking today with Kathy at her weekly Slow Sunday Stitching.

Until next time,
Jill

Sunday, January 12, 2020

Paris Reveal

This week I was extra slow on stitching.  Paris is 99% done! Today I finished the ❤️ and noticed a few missing stitches. It's okay. I consider Paris complete  and ready to go to the finisher when it either stops snowing, sleeting or raining in Michigan. The finisher is 25 miles away. I wish I could send moisture Australia's way.

Mr. Poodle came out well. His mane is tight and curly giving him added dimension.  I question myself, "is Paris calling a visit?"  

Linking with Kathy's Slow Sunday Stitchers who stitch much faster than I!

Jill

Sunday, March 25, 2018

Applique Practice

Making an applique quilt is on the list. The Flower Pots quilt pattern by Kim McLean was bought a couple of years of ago. Now it is time to practice in order to get started.

Yesterday, notions and fabric were gathered and some prep work was accomplished in order to join Kathy's Slow Sunday Stitching party today.  :-)  I am going to try freezer paper and needle turn. The method that I choose will be the one that I find the easiest for myself. Wish me luck.


Some may have seen my needlepoint heart project. I am still working on the background. Initially, I thought the background was relaxing. Now it is leaning towards becoming boring (geesh). Another reason to practice applique stitches. ;-)

The red and white disappearing four patch has made some progress. This week a bit more work needs to be done in order to meet my OMG at Elm Street Quilts come Saturday.  Self discipline will be required early this week !
Jill


Applique Practice

Making an applique quilt is on the list. The Flower Pots quilt pattern by Kim McLean was bought a couple of years of ago. Now it is time to practice in order to get started.

Yesterday, notions and fabric were gathered and some prep work was accomplished in order to join Kathy's Slow Sunday Stitching party today.  :-)  I am going to try freezer paper and needle turn. The method that I choose will be the one that I find the easiest for myself. Wish me luck.


Some may have seen my needlepoint heart project. I am still working on the background. Initially, I thought the background was relaxing. Now it is leaning towards becoming boring (geesh). Another reason to practice applique stitches. ;-)

The red and white disappearing four patch has made some progress. This week a bit more work needs to be done in order to meet my OMG at Elm Street Quilts come Saturday.  Self discipline will be required early this week !
Jill


Sunday, February 4, 2018

Slow Heart Stitching

On this first Sunday in February, I continue on stitching a Valentine heart. I am almost half way. It is enjoyable stitching with fancy threads.


While I watch TV this afternoon, I will be crocheting something easy. A crocheted edge fleece throw. Here is a recent one finished which is part of a charity project.

Since I am not a football fan and much prefer golf, I rather watch the PGA Tournament held in Scottsdale, AZ vs the Super Bowl.  The green golf course is refreshing to my snow-weary Michigan eyes.  Maybe there will be a peak of blue sky.

Please visit other stitchers at Kathy's weekly linky party called Slow Sunday Stitching. It is motivational and relaxing!

Jill

Sunday, November 19, 2017

Santa Stitching

Today stitching will continue on the needlepoint Santa ornament. Some progress was made this past week.

Work has begun on his hat and beard, fur trim, and gift. As each section is completed, Santa is coming to life.

The past few days I was sidetracked by going to an estate sale and antique show. Coincidentally, I "found" other Santas that just had to come home with me. 😊

Another found treasurer was a hand stitched needlepoint eyeglass case which will hold my drug store "readers / magnifiers" nicely.  The lady made clever use of her leftover persain wool.  I don't have to make a case and the colorful scrappy fibers make it easy to find.
Therefore, today I will join Kathy and others at Slow Sunday Stitching to finish in time for Christmas gift giving.

Enjoy your Sunday,
Jill


Santa Stitching

Today stitching will continue on the needlepoint Santa ornament. Some progress was made this past week.

Work has begun on his hat and beard, fur trim, and gift. As each section is completed, Santa is coming to life.

The past few days I was sidetracked by going to an estate sale and antique show. Coincidentally, I "found" other Santas that just had to come home with me. 😊

Another found treasurer was a hand stitched needlepoint eyeglass case which will hold my drug store "readers / magnifiers" nicely.  The lady made clever use of her leftover persain wool.  I don't have to make a case and the colorful scrappy fibers make it easy to find.
Therefore, today I will join Kathy and others at Slow Sunday Stitching to finish in time for Christmas gift giving.

Enjoy your Sunday,
Jill


Sunday, November 12, 2017

Santa Stitching and Fall Paducah

I am happy to join Kathy at Slow Sunday Stitching and others today after a posting absence. In the meantime, I have been sidetracked from quilting by needlepoint. Today I will be adding stitches to a small hand painted Santa canvas which will be a gift for my DIL.


It's an ornament size measuring five inches tall.  Santa's suit is stitched with red Very Velvet needlepoint thread. If I work on a section a day, it will be done in time for Christmas.....

Since my last post, I was fortunate to have been able to go on my first bus tour group to Paducah for AQS's first Fall Show. It was a wonderful show and well worth a full day of travel.  A highlight was seeing Teresa Rawson and her award winning quilt, Contentment.  A bonus was that I happened to be there when she was interviewed by Bonnie Browning.


The people of Paducah are some of the friendliest people I have meet in one town. Our tour director made it possible to meet none other than The Quilt Man himself.

So many stunning and intricate quilts. There were plenty of vendors to purchase items that are not always available in the LQS. A variety of fat quarters, modern to repros, came home with me. I am favoring the repro cheddars as they are hard to find.

Enjoy your Slow Sunday Stitching,
Jill

P.S. Today I learned about Stitchery Link Party hosted by Super Mom No Cape. I shall be hand stitching over there also.


Santa Stitching and Fall Paducah

I am happy to join Kathy at Slow Sunday Stitching and others today after a posting absence. In the meantime, I have been sidetracked from quilting by needlepoint. Today I will be adding stitches to a small hand painted Santa canvas which will be a gift for my DIL.


It's an ornament size measuring five inches tall.  Santa's suit is stitched with red Very Velvet needlepoint thread. If I work on a section a day, it will be done in time for Christmas.....

Since my last post, I was fortunate to have been able to go on my first bus tour group to Paducah for AQS's first Fall Show. It was a wonderful show and well worth a full day of travel.  A highlight was seeing Teresa Rawson and her award winning quilt, Contentment.  A bonus was that I happened to be there when she was interviewed by Bonnie Browning.


The people of Paducah are some of the friendliest people I have meet in one town. Our tour director made it possible to meet none other than The Quilt Man himself.

So many stunning and intricate quilts. There were plenty of vendors to purchase items that are not always available in the LQS. A variety of fat quarters, modern to repros, came home with me. I am favoring the repro cheddars as they are hard to find.

Enjoy your Slow Sunday Stitching,
Jill

P.S. Today I learned about Stitchery Link Party hosted by Super Mom No Cape. I shall be hand stitching over there also.


Sunday, September 3, 2017

Knitting Goal Met

This afternoon I slowly knitted the crown of a pink newborn hat that I have been working on the past several weeks. It has been my Slow Stitching Sunday goal. The slow part was switching from a circular needle to DPNs. I found it to be a personal challenge.
With a satisfactory result after several previous not-so-good hat attempts, I'm going to take a hat knitting break and find another needlework project. Knitting in the round on a circular needle is relaxing; the DPNs are cumbersome. Next time I will try the magic loop method for decreasing.

Happy Labor Day to us in the States and our Canadian neighbors.

Jill


Knitting Goal Met

This afternoon I slowly knitted the crown of a pink newborn hat that I have been working on the past several weeks. It has been my Slow Stitching Sunday goal. The slow part was switching from a circular needle to DPNs. I found it to be a personal challenge.
With a satisfactory result after several previous not-so-good hat attempts, I'm going to take a hat knitting break and find another needlework project. Knitting in the round on a circular needle is relaxing; the DPNs are cumbersome. Next time I will try the magic loop method for decreasing.

Happy Labor Day to us in the States and our Canadian neighbors.

Jill


Sunday, August 20, 2017

Relaxed Knitting

I am delighted to be able to share my simple knitting project today with Slow Stitching Sunday hosted by Kathy. Since she is up to hosting her popular weekly link up, she may be on the road to recovery. If she can host, the least I can do is write a post. Thanks, Kathy, for your motivation.


It is enjoyable to be knitting a pink newborn hat for charity. It is especially rewarding and relaxing after several failed attempts. I will spare you the frustrating details, however, they included DPNs, straight needles (required a seam), too-long circular needles, magic loop, and incorrect needle size for specific yarn. Did I mention knitting up a gauge swatch was beneath me. Tsk, tsk. Soon I became obsessed in mastering a baby hat.

Therefore, back to knitting basics such as following the pattern with the correct yarn and needle size.  A gauge swatch was made. Success. Next a trip to my LYS with hopes of finding a shorter length circular needle. Another success. Bonus was the moral support and advice provided by LYS (somethings you can't get online). I am using ChiaoGoo circular needles bamboo size 6 with a 16-inch length. Initially, the cast-on (64 stitches) and first two rows seemed a bit tight, however, the stitches soon relaxed as I did also. It has been smooth knitting ever since.

The simple easy-to-follow pattern is written by Heather Wells. Click HERE for pattern. As you can see, I am making a solid color version. Knitting two-color stripes can wait for the second hat. Lol. Yarn is Cascade Superwash 220 which is quality yarn and soft for my knitting fingers, but more importantly, soft for baby's head.

Stay tuned on when the results when I am forced to use DPNs for crown shaping. Since I won't be starting the pattern with them, I think I shall be okay. Any suggestions and/or advice is appreciated.

Smooth stitches,
Jill


Relaxed Knitting

I am delighted to be able to share my simple knitting project today with Slow Stitching Sunday hosted by Kathy. Since she is up to hosting her popular weekly link up, she may be on the road to recovery. If she can host, the least I can do is write a post. Thanks, Kathy, for your motivation.


It is enjoyable to be knitting a pink newborn hat for charity. It is especially rewarding and relaxing after several failed attempts. I will spare you the frustrating details, however, they included DPNs, straight needles (required a seam), too-long circular needles, magic loop, and incorrect needle size for specific yarn. Did I mention knitting up a gauge swatch was beneath me. Tsk, tsk. Soon I became obsessed in mastering a baby hat.

Therefore, back to knitting basics such as following the pattern with the correct yarn and needle size.  A gauge swatch was made. Success. Next a trip to my LYS with hopes of finding a shorter length circular needle. Another success. Bonus was the moral support and advice provided by LYS (somethings you can't get online). I am using ChiaoGoo circular needles bamboo size 6 with a 16-inch length. Initially, the cast-on (64 stitches) and first two rows seemed a bit tight, however, the stitches soon relaxed as I did also. It has been smooth knitting ever since.

The simple easy-to-follow pattern is written by Heather Wells. Click HERE for pattern. As you can see, I am making a solid color version. Knitting two-color stripes can wait for the second hat. Lol. Yarn is Cascade Superwash 220 which is quality yarn and soft for my knitting fingers, but more importantly, soft for baby's head.

Stay tuned on when the results when I am forced to use DPNs for crown shaping. Since I won't be starting the pattern with them, I think I shall be okay. Any suggestions and/or advice is appreciated.

Smooth stitches,
Jill


Sunday, October 16, 2016

Slow Knitting

This is an applicable post to rejoin kindred hand stitchers at Slow Sunday Stitching hosted by Kathy. I have been very slooow on hand stitching and blogging since the warm months.  Upon the return to cooler months (in North America) and hand stitching, I am determined to complete what was previously started.


I decided it was okay to finish the bunny in Autumn as the emphasis is on a finish.  On and off I have been refreshing my knitting skills on a knitted bunny pattern by Julie Williams of Little Cotton Rabbits. I viewed knitting videos both on youtube and Craftsy which was beneficial. Progress was accomplished last week when I completed the bunny.


Today, I am knitting the bunny's pink dress.


Visit the others at Slow Sunday Stitching to view hand stitched projects.


Slow Knitting

This is an applicable post to rejoin kindred hand stitchers at Slow Sunday Stitching hosted by Kathy. I have been very slooow on hand stitching and blogging since the warm months.  Upon the return to cooler months (in North America) and hand stitching, I am determined to complete what was previously started.


I decided it was okay to finish the bunny in Autumn as the emphasis is on a finish.  On and off I have been refreshing my knitting skills on a knitted bunny pattern by Julie Williams of Little Cotton Rabbits. I viewed knitting videos both on youtube and Craftsy which was beneficial. Progress was accomplished last week when I completed the bunny.


Today, I am knitting the bunny's pink dress.


Visit the others at Slow Sunday Stitching to view hand stitched projects.


Sunday, March 2, 2014

Speed It Up

On this Slow Sunday Stitching I need to speed up to fast stitching.  Why?  Two large quilt show entry deadlines are quickly approaching.

It reminds me of the hilarious skit from a classic I Love Lucy episode when Lucy and Ethel get a job at a candy factory and the supervisor hollers, "Speed It Up."


The National Quilt Association moved up their annual show date by one month. It should have been obvious to me that this would also change the quilt entry deadline by one month.  However, my brain has been in hibernation this long bitter winter. This past week I was nudged awake while admiring the completion of a fellow blogger's appliqued quilt. Baltimore Rhapsody can be viewed at Fabric Therapy.

Upon coming out of my winter lull, I quickly checked quilt websites and calendars. Yikes! I have to complete my unnamed quilt by the end of March. The other show I would like to enter is the Sauder Village Quilt Show.

Instead of becoming discouraged with the amount of unfinished blocks, I decided to appreciate the finished blocks. Therefore, I rotated the quilt in my frame, so while I stitched I could see the completed blocks vs. the uncompleted blocks.

Stitching with Finished Blocks

Stitching with Unfinished Blocks

Quilting with the completed blocks is more of an encouragement to keep stitching.

During the past few days, I have been timing my stitching in order to estimate the doability of completion. It may be possible to finish it and still be able to eat, sleep, and do laundry.  Lol!

If you need a chuckle while stitching along with others at Kathy's Slow Sunday Stitching, click here to watch a 1:45 second video of Lucy and Ethel at the candy factory video.

This week will determine if I can meet my deadlines.  Stay tuned.....

Monday, January 20, 2014

Basting with Boards?

Have you heard of basting a quilt with boards?  I hadn't until I found an online tutorial.  My initial reaction was that it would be cumbersome, bulky and fussy.  Nope, it is not.  Quite the opposite.

Board basting.  Who'd of thunk it?  Certainly not me.  I learned this method by watching a tutorial by Sharon Schamber on YouTube.  It explains the process very well.

Using boards to baste the three layers of a quilt appealed to me because:  1) No crawling around my floor stitching from center outwards in every direction.  2)  Save on lower back strain by not have to be bent during the basting process.   3)  No twisted body contortions trying to reach center.  4)  No shifting of fabric while attempting to baste the whole quilt while spread out.  5)  Reduces the chance of unforeseen puckers and loose fabric as all three layers are held down by the boards.

Following are the steps that I took.  Please note there is more detailed information on Sharon's video.

1.  I purchased two 1" x 3" trim board with a length five to ten inches longer than backing.  Made sure they were straight, cured and/or painted. Mine were purchased at Home Depot for approximately ten bucks for the pair.


2.  Back (previously pieced, starched and cut to size) was laid out face down on a flat surface which at my house is the basement floor.  Top was centered on top of backing with fabric face up.  No batt just yet:


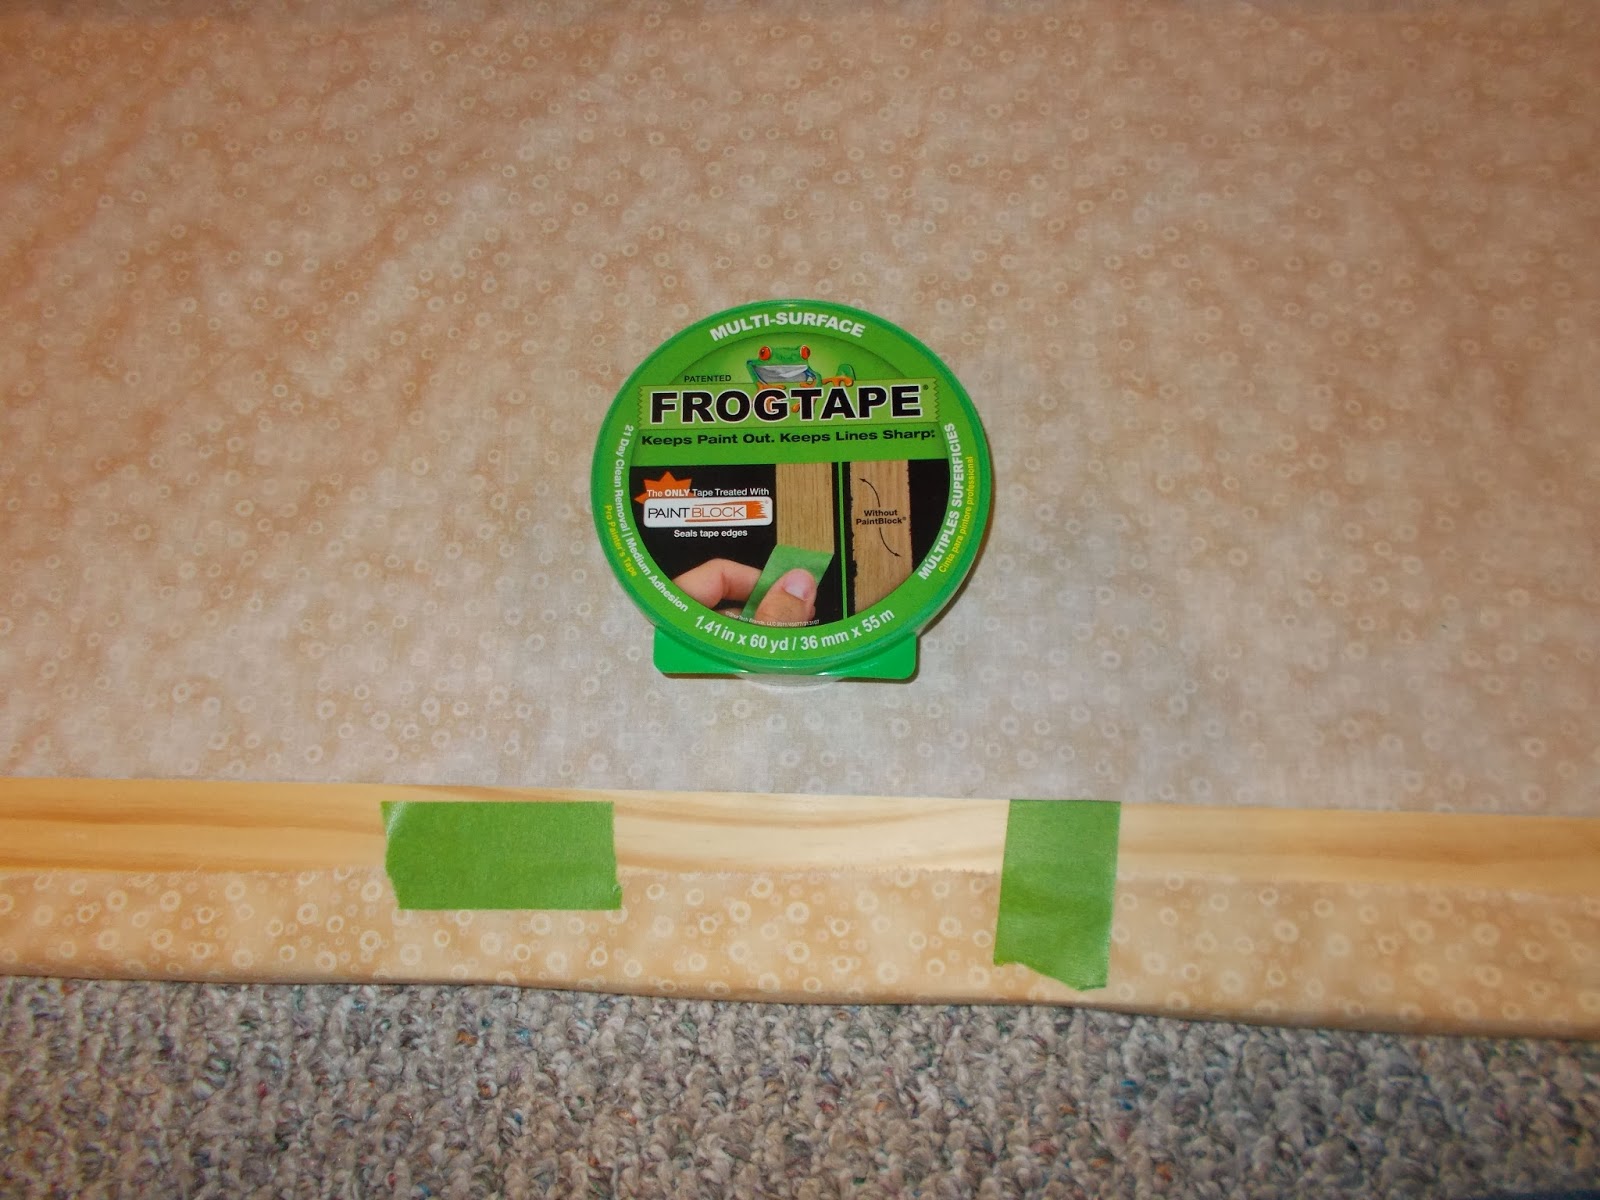
3.  One board is placed horizontally along the bottom edge of quilt top. I used painters tape to adhere fabric to the wood for a smooth start on wrapping the fabric on board:


4.  Second board is placed horizontally along the bottom edge of backing.

5.  Begin to roll up board with quilt top holding the fabric taut as you roll for approximately 12-16 inches:


6.  Begin to roll up board holding backing. Again I used painters tape to adhere fabric along wood. This board was rolled up 12-16 inches to meet the first board:


7.  Both boards were rolled up in tandem in increments of 12 to 16 inches.  I found that the weight of the first board in keeping the back fabric weighted down thus taut:


8.  Board with back fabric was then turned around and placed on my pushed together tables:


9.  Unrolled board with back (right side face down) for approximately 12-16 inches.

10.  The batt was then placed on top of back. Batt is laid out flat and spread on table.

11.  The board with quilt top was then placed on backing and unrolled 12-16 inches:


Just like a quilt sandwich:
  • Bottom layer is the back (right side down)
  • Middle layer is the batt
  • Top layer is the quilt top (right side up)

12.  Begin the basting process in a herringbone stitch working right to left or left to right, whatever your preference.  As I basted each section, I then pulled quilt down and unrolled another 12 inches or so of the fabric on both boards. Bottom board goes underneath the batt.  Top board goes above the bat.  It all stays together with perhaps minor smoothing of fabric:


That is it!  All three layers of the quilt sandwich stay reasonably smooth and taut during basting.  I was able to sit comfortably and baste in horizontal sections of the quilt.  I found it to be more manageable and relaxing than having to be bent over while basting from center out in all different directions.

All three layers held together nicely with the boards.  Below is a view on the last section to be basted.  Note the fabric is still taut and all three layers stay together:


The outcome was one of my best basted quilts:  


Now basted quilt fits nicely into my Q-Snap quilting frame and I can begin to hand quilt any section that I desire as all layers are well secured.


Other items that I found beneficial:
  • extra tables pushed together to support quilt (card table, portable table and my secondhand cutting table)
  • spray starched (non-aerosal) the backing fabric
  • pearl cotton #8 for basting (snuggles nicely with all layers)
  • good needle threader that would accommodate the pearl cotton
  • thimble
  • good lighting
  • chair with back support and preferable one with wheels
If you are satisfied with traditional basting and never try this method, at least consider basting with #8 pearl cotton.  It is smooth, easier to handle than thread, holds the layers nicely together and it still allows for fabric movement.   

If this post has peaked your interest and are considering this method, here is the link once more to Sharon's basting tutorial.

Now that the basting part is over and the quilt is in the frame, I can now link up to Kathy's popular Slow Sunday Stitching as I was finally able to begin hand quilting my Civil War Era repro quilt on Sunday.  Yay!