Monday, January 20, 2014

Basting with Boards?

Have you heard of basting a quilt with boards?  I hadn't until I found an online tutorial.  My initial reaction was that it would be cumbersome, bulky and fussy.  Nope, it is not.  Quite the opposite.

Board basting.  Who'd of thunk it?  Certainly not me.  I learned this method by watching a tutorial by Sharon Schamber on YouTube.  It explains the process very well.

Using boards to baste the three layers of a quilt appealed to me because:  1) No crawling around my floor stitching from center outwards in every direction.  2)  Save on lower back strain by not have to be bent during the basting process.   3)  No twisted body contortions trying to reach center.  4)  No shifting of fabric while attempting to baste the whole quilt while spread out.  5)  Reduces the chance of unforeseen puckers and loose fabric as all three layers are held down by the boards.

Following are the steps that I took.  Please note there is more detailed information on Sharon's video.

1.  I purchased two 1" x 3" trim board with a length five to ten inches longer than backing.  Made sure they were straight, cured and/or painted. Mine were purchased at Home Depot for approximately ten bucks for the pair.


2.  Back (previously pieced, starched and cut to size) was laid out face down on a flat surface which at my house is the basement floor.  Top was centered on top of backing with fabric face up.  No batt just yet:


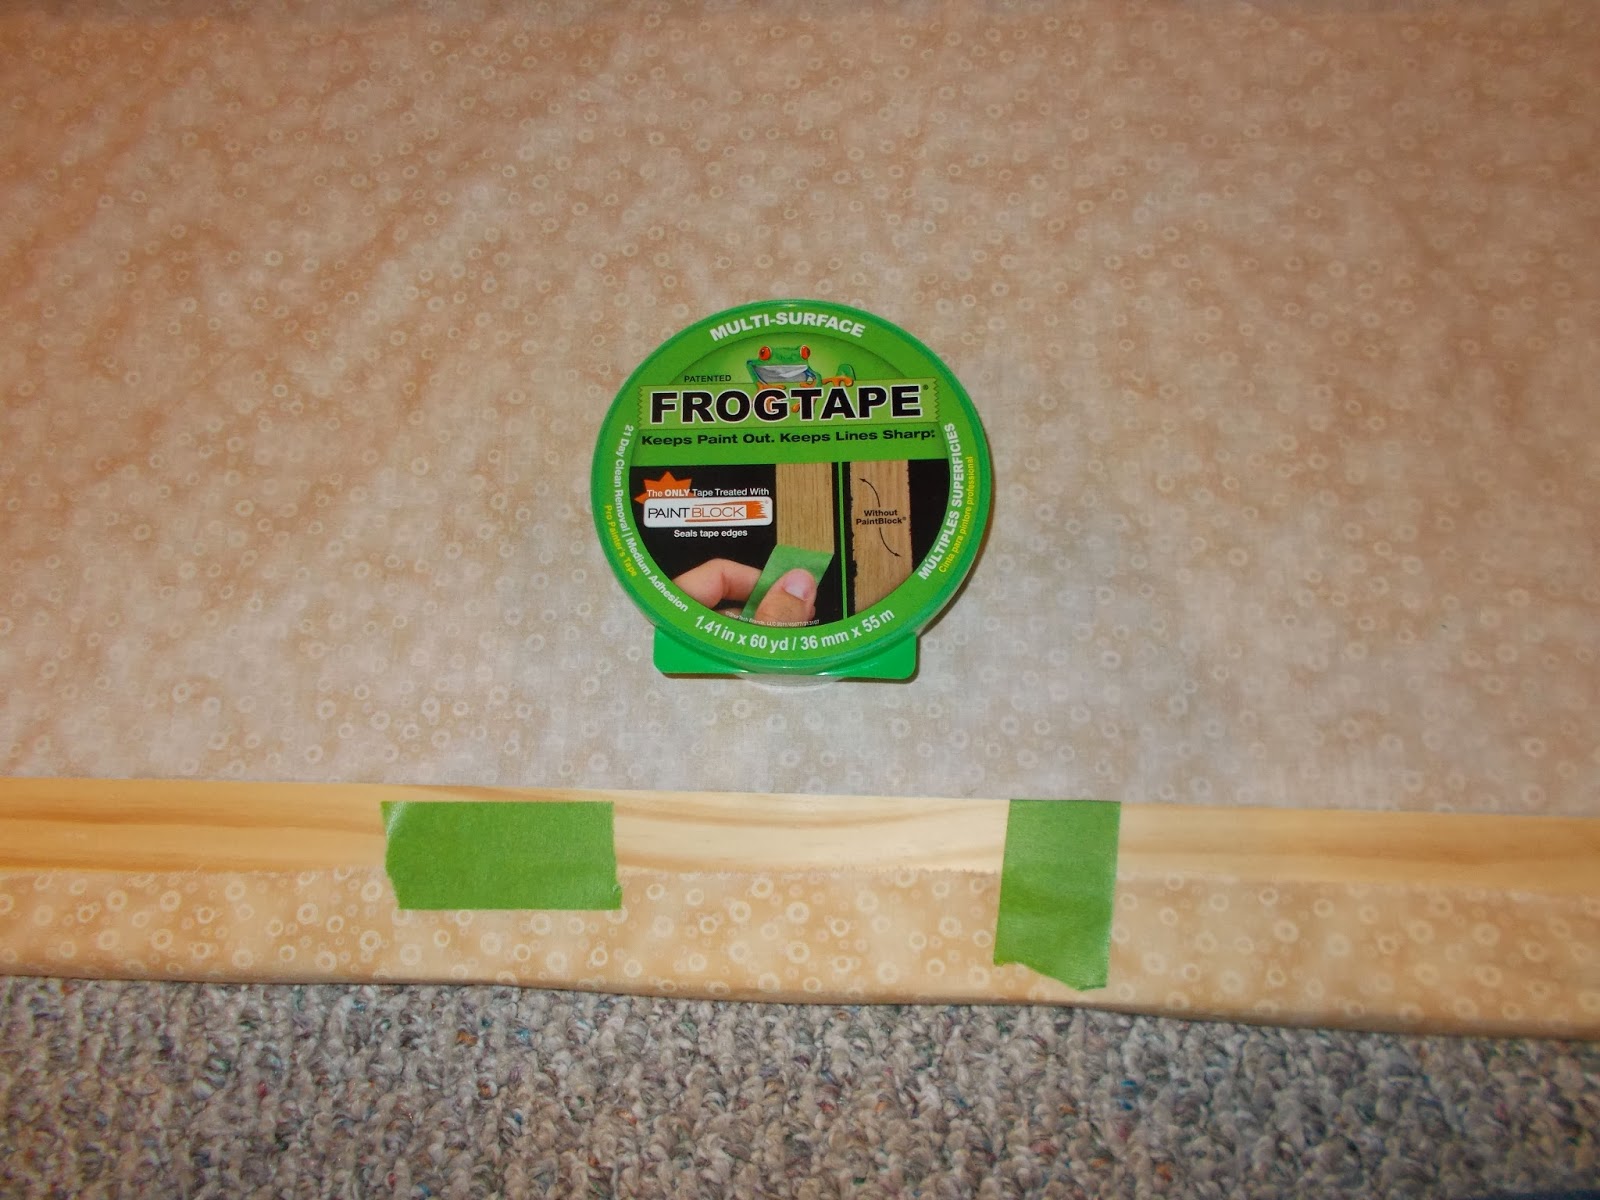
3.  One board is placed horizontally along the bottom edge of quilt top. I used painters tape to adhere fabric to the wood for a smooth start on wrapping the fabric on board:


4.  Second board is placed horizontally along the bottom edge of backing.

5.  Begin to roll up board with quilt top holding the fabric taut as you roll for approximately 12-16 inches:


6.  Begin to roll up board holding backing. Again I used painters tape to adhere fabric along wood. This board was rolled up 12-16 inches to meet the first board:


7.  Both boards were rolled up in tandem in increments of 12 to 16 inches.  I found that the weight of the first board in keeping the back fabric weighted down thus taut:


8.  Board with back fabric was then turned around and placed on my pushed together tables:


9.  Unrolled board with back (right side face down) for approximately 12-16 inches.

10.  The batt was then placed on top of back. Batt is laid out flat and spread on table.

11.  The board with quilt top was then placed on backing and unrolled 12-16 inches:


Just like a quilt sandwich:
  • Bottom layer is the back (right side down)
  • Middle layer is the batt
  • Top layer is the quilt top (right side up)

12.  Begin the basting process in a herringbone stitch working right to left or left to right, whatever your preference.  As I basted each section, I then pulled quilt down and unrolled another 12 inches or so of the fabric on both boards. Bottom board goes underneath the batt.  Top board goes above the bat.  It all stays together with perhaps minor smoothing of fabric:


That is it!  All three layers of the quilt sandwich stay reasonably smooth and taut during basting.  I was able to sit comfortably and baste in horizontal sections of the quilt.  I found it to be more manageable and relaxing than having to be bent over while basting from center out in all different directions.

All three layers held together nicely with the boards.  Below is a view on the last section to be basted.  Note the fabric is still taut and all three layers stay together:


The outcome was one of my best basted quilts:  


Now basted quilt fits nicely into my Q-Snap quilting frame and I can begin to hand quilt any section that I desire as all layers are well secured.


Other items that I found beneficial:
  • extra tables pushed together to support quilt (card table, portable table and my secondhand cutting table)
  • spray starched (non-aerosal) the backing fabric
  • pearl cotton #8 for basting (snuggles nicely with all layers)
  • good needle threader that would accommodate the pearl cotton
  • thimble
  • good lighting
  • chair with back support and preferable one with wheels
If you are satisfied with traditional basting and never try this method, at least consider basting with #8 pearl cotton.  It is smooth, easier to handle than thread, holds the layers nicely together and it still allows for fabric movement.   

If this post has peaked your interest and are considering this method, here is the link once more to Sharon's basting tutorial.

Now that the basting part is over and the quilt is in the frame, I can now link up to Kathy's popular Slow Sunday Stitching as I was finally able to begin hand quilting my Civil War Era repro quilt on Sunday.  Yay!


Sunday, January 12, 2014

Knitted Bunny

Today I look forward to beginning a new hand knit project.  I have not knitted in many years, but this super cute girl bunny has tempted me to pick up yarn again:


I first saw knitted bunnies on a Quiltsalott posting.  My reaction was "Aw, too cute."  I was curious and followed the link to Little Cotton Rabbits and was smitten with all the bunny rabbits. It was easy to purchase and download the pattern.

Next was a trip to a local yarn store (the brick and mortar variety) and a refresher knitting demo on YouTube, and I am ready to start clicking those needles.


Since I haven't knitted in years, I had no supplies not even a scrap of yarn.  Therefore, the initial bunny will not be inexpensive although the pattern itself is an excellent value.

It is amazing that I can purchase a pattern from across an ocean and have it printed in full color within seconds.

I am grateful to have discovered Kathy's Slow Sunday Stitching weekly linky party as I am a slow stitcher. I need to start my knit stitches in January to be completed by Easter.


Monday, January 6, 2014

Design Wall Ta Da!

Quilt top is finished and ready to be removed from the Design Wall. Finally! It took longer than I had anticipated, but I presevered.


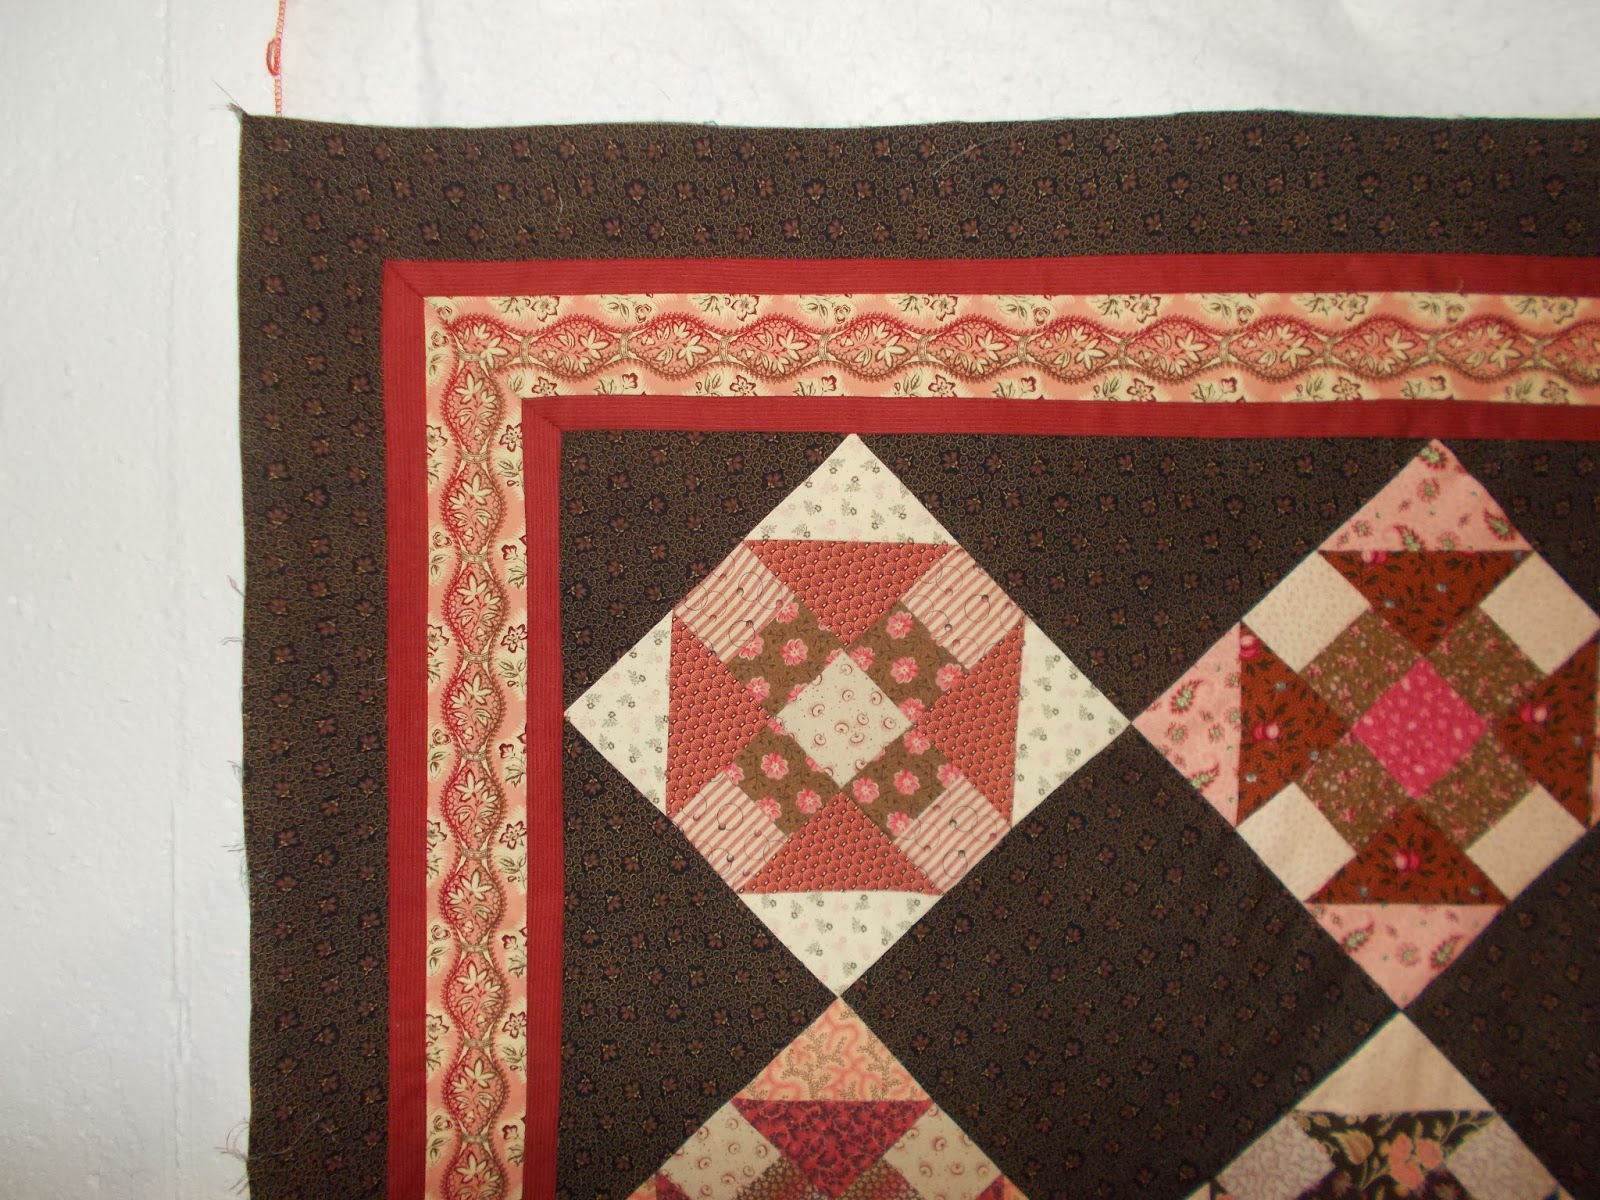
Mitered borders were manageable.  Due to having one patterned print and three other fabrics in the border, the process was a bit more tedious.  Many quilters do not precut mitered borders prior to sewing to quilt. However, I did precut them with the 45 degree angle thus making the fabric easier to handle with less bulk. Note, there were triple checks of pre-measuring prior to cutting.

I learned this method on an excellent YouTube video  by Deonn Stott and Cindy sponsored by Riley Blake Designs.  It was very beneficial. I was hoping to have flowers meet at the exact angle, but I was unable to pull that off.  I did decide that
having the miters meet and lay flat was good enough for me. The overall look of the mitered design suffices.

Batting has been ordered. A shirting fabric for the backing was purchased at a local quilt store.  I hope to begin basting this week.

I live in the half of the country that is affected by the Polar Vortex, thus it felt good to stay in and sew.  Did you stay in and sew due to the dangerously frigid temperatures?

View from Quilting Dreams in Marine City, MI
US Coast Guard Ice Cutter keeping the St. Clair River open

This will be the last Monday that this quilt, "Tara," (don't hold me to the name) will be posted on Judy's Patchwork Times Design Wall Mondays. Please check the others out.  There are many pretty ones posted this week.


Monday, December 23, 2013

Design Wall ~ The Final Stretch

Finally, all blocks assembled. Two border units completed. Two more to go.  Then the real fun begins when I attempt to miter the corners with the border print.


Hope to complete the top sometime during the next week or two.  I need to order batting and backing fabric. Then this quilt top will come off the design wall and into a quilt frame for hand quilting.  Several ideas are roaming in my mind for next quilt project to put up on my design wall.

The Design Wall Mondays hosted by Judy at Patchwork Times have kept me motivated. May you all have a blessed Christmas.


Tuesday, December 17, 2013

Why We Need to Prewash Quilt Fabric

In preparation of my quilt borders, I needed to order extra fabric.  It arrived promptly from the Holly and Ivy Etsy shop.

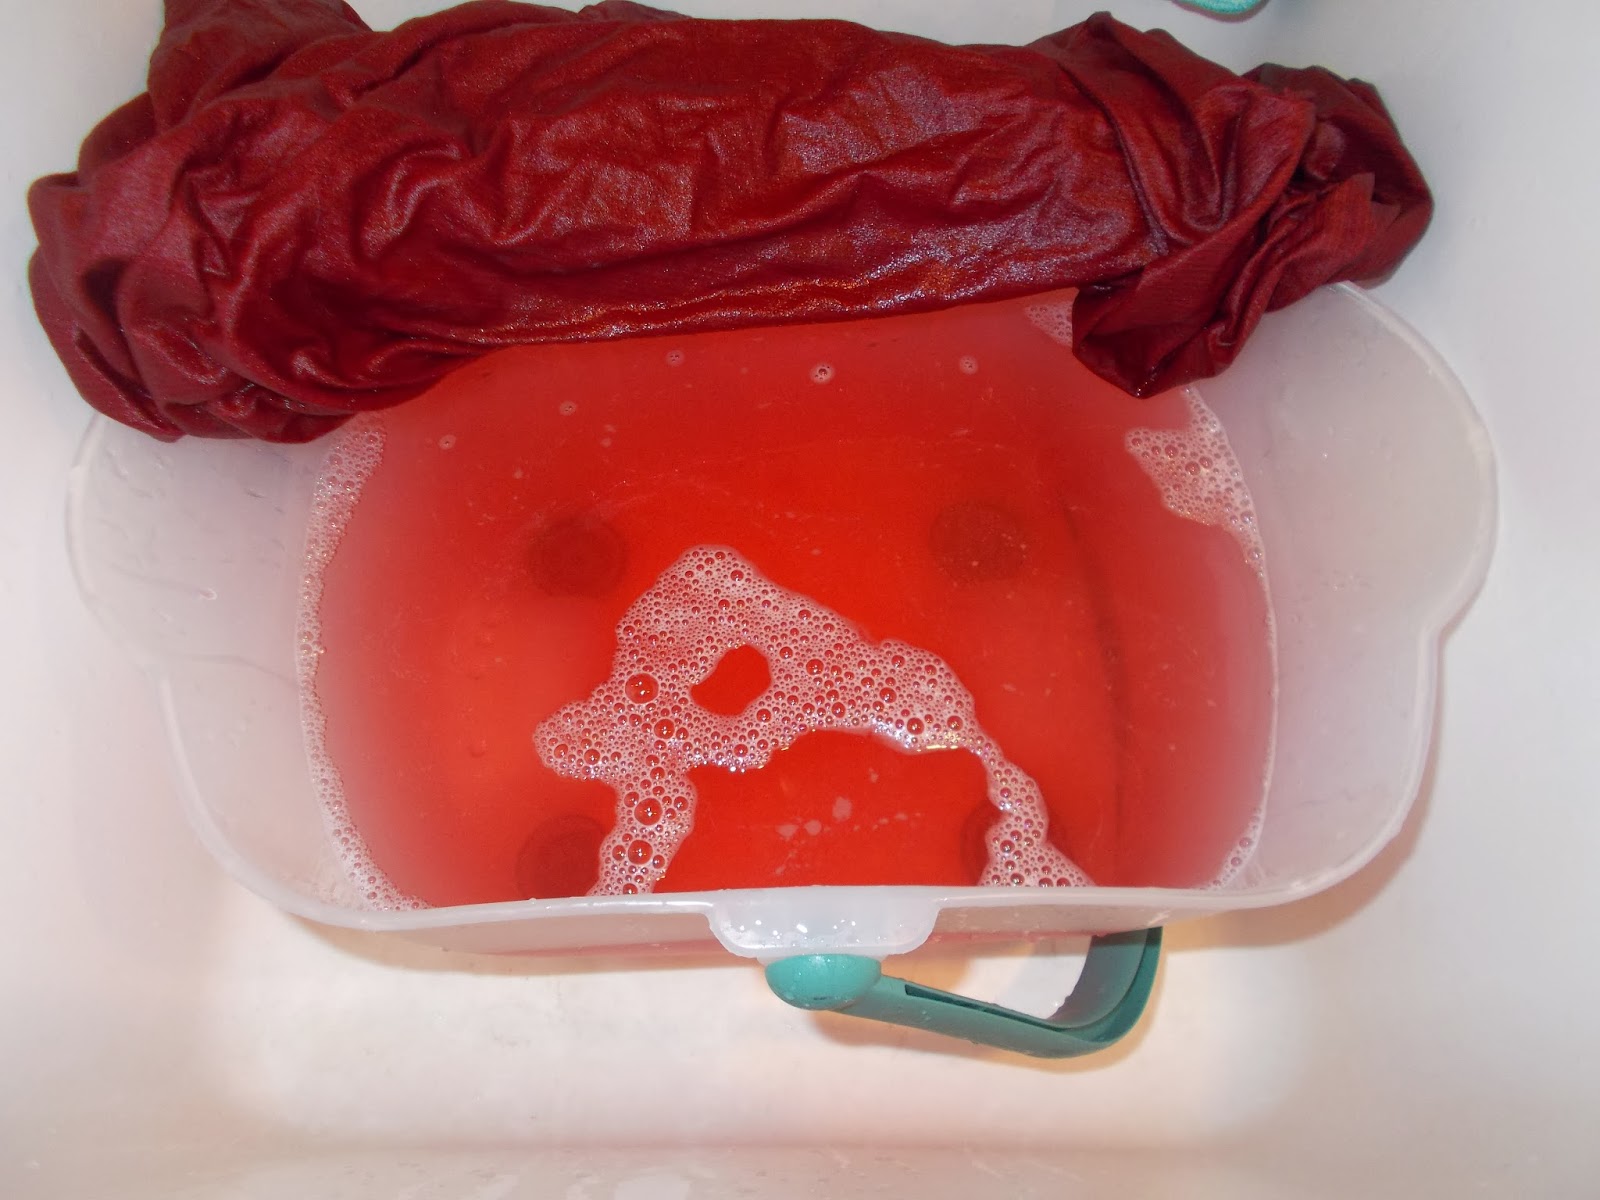
Prior to anxiously cutting into the fabric, I realized that I had to delay one day by prewashing / soaking the rusty burgandy Moda fabric (the good stuff).  Gosh, am I glad I did!

First soak in lukewarm water and dye-free All (small amount)
Second soak in very warm water and Synthrapol SP
(a textile detergent)
Last, but not least, third soak in cold water and white vinegar
Phew! I am now confident to proceed without fabric worries other than attempting to line up fabric for a nice mitered border.  Here's a sneak peak:

Practicing border layouts
Check out other Esther's blog to see her last WOW linky party for 2013.

Wednesday, December 11, 2013

Golf Ornament Reveal

My slow stitching project was completed in time for the annual ornament exchange at my ladies golf league Christmas dinner.  It got down to the wire.  Stitching was completed, inset was pieced with golf-theme fabric and tied with red velvet ribbon with six hours to spare!  Lucky for me the party was in the evening and not a luncheon.


Phew! It was not perfect, but good enough. It was well received. Above it is pictured on a table-top tree. Finished size was about 4 inches.  Thanks to all the encouragement on sticking with it. 


Sunday, December 8, 2013

Slow Stitching Ornament

This is just a quick post to show my SLOW stitching progress on my cross stitch project began last week.  I was hoping to show the completed ornament this week, however, my stitching is a behind schedule due to other holiday preparations and activities. Am I the only one lagging behind?

Center of ornament will be the design within dashed lines.
The golf hole is complete. Today I work on the pretty blue sky and clouds. Tomorrow the design will be set as an insert into golf-theme fabric and then made into an ornament.  Of course, it should have been completed by now, but I still have two more days before the ornament exchange.  Lol!

To see pretty projects, see Kathy's Quilts weekly post entitled Slow Stitching Sunday.

Sunday, December 1, 2013

Slow Stitching Sunday

Today is my first link-up to Kathy's Quilts weekly link party entitled Slow Stitching Sunday.

My current quilt is not ready for hand work. Therefore, I am cross stitching a small item to give as part of an ornament exchange for my golf league. I purchased this colorful pattern online from CrossStitch and it downloaded it to my computer. How simple is that? Gosh, I didn't even have to pay postage.

Original intent is for a bookmark, but I am only stitching the middle section of golf hole, green and sky. I will then use this as an insert to some golf fabric from my stash which will be stuffed. I will then tie a pretty red ribbon for hanging.


Ten days left on the calendar to complete it! It is now time to prioritize my time. Hopefully, next week I can show the completed ornament. May you find time during this busy season to do some stitching even if it is for a few minutes. It all adds up.


Thursday, November 28, 2013

My New Sewing Buddy


My new best friend is a Featherweight 221. A recent estate sale find. Birth year is 1957.

One of my dreams was to find a nice clean FW at a garage and/or estate sale at a frugal price. My wish partially was fulfilled recently after many years of searching. I was at a conducted estate sale (one which is run by a company). Upon walking into the family room another shopper already had the FW (with case) in his possession. Drats! Then to my own astonishment, I heard myself offer him more money then it was priced. He accepted my offer.

I left the well-kept home almost skipping down the street. The cost of my FW was not a wishful price like we all hear about of one paying a few dollars at a garage sale. However, it was still a bargain as I paid a lot less than ebay or antique store prices.

Upon arriving at its new home for the real test drive, the motor seemed to run hard/sluggish. Oh dear. After a few repair quotes were obtained from several professionals ($70-$150), I decided to attempt to fix it myself.

With the combination of the manual and FW online resources, I was able to get the machine running smoothly. Actually, the end result was that it was a simple fix and only required minor surgery:


My "surgery" supplies:
  • Natural daylight
  • Old vinyl tablecloth and bath towel to protect my kitchen table
  • Tweezers
  • Magnifying glass
  • Screwdriver
  • Rubberband (for gripping purposes)
  • Hair dryer with nozzle (to blow out the lint)
  • Cotton swaps (Q-Tips)
  • Liquid Wrench (one drop to clean old gunk out of gears)
  • Flashlight
  • Toothpicks
  • Sewing Machine Oil
My main sluggish problem was due to lint and threads entangled around bobbin spindle and casing. This is called a "thread jam" per Nova Montgomery on her FW website and is common with FWs.


I pulled out lint and white thread

and next blue thread all wrapped around bobbin case spindle
No wonder it was running sluggish.


At a later date, I may have FW professionally cleaned. In the meantime, I plan on sewing and learning more about care and maintenance. Below are unsolicited FW websites that were beneficial (in no particular order):

http://www.april1930s.com
http://www.novamontgomery.com
http://www.featherweight221.com
http://www.treadleon.net
http://singerfeatherweight221.blogspot.com
http://www.singerco.com
http://www.wikihow.com/Adjust-the-Tension-on-a-Sewing-Machine

A future purchase may be a book about Featherweights by Nancy Johnson-Srebro. I is recommended by many and has good reviews.

Also, there is an online Featherweight Club at My Quilt Place hosted by the American Quilters Society.

Perhaps, you share the same dream of finding a reasonable-priced Featherweight? Don't give up. It will come when you least expect it.


Wednesday, November 20, 2013

Diagonal Blocks Set on Point


All my diagonal blocks have been pieced into rows.  It's taken a long time to get to this stage of my browns & pinks reproduction fabrics.


I hope the above photo is a quick, easy and visual tip for the beginner quilter on how diagonal blocks are pieced into rows.

My next step is to piece the rows. Having a design wall is very helpful. My inexpensive "design wall" is just the reverse side of a flannel-backed tablecloth temporarily tacked onto my basement wall. Click here for previous post.

To see other great works in progress this week, check out Esther's Blog.

Monday, October 21, 2013

Design Wall and Sewing Corner Clean-up!

This week the majority of my sewing time was spent decluttering my basement sewing corner.  I think my sewing clutter multiplied when I wasn't looking (wink).  Sewing amongst too much clutter was not pleasant. I was recently motivated by Teresa over at Fabric Therapy when she reorganized her Quilt Cave.

The decluttering and reorganizing process was a real chore as I dislike doing it but love the results! Therefore, visualizing sitting down to sew in an organized space was my motivation.


I sorted all the notions, etc. and categorized them in their own containers which are inexpensive Glad or Ziplock containers.  They are lightweight and see-though.


Items still handy in cabinet which is behind my chair.


Maybe one day I will get around to labeling the containers, but for now my time is better spent working on the quilt!

Reorganizing still in progress.  Piles and baskets of fabric and to do projects were not in view of the camera.  Haven't touched the fabric, patterns & notes, and buttons yet!

Maybe others have accomplished more sewing this week. Check out more Design Walls at Patchwork Times hosted by Judy L.


Monday, October 14, 2013

Blocks All Pieced

Upon sewing a few blocks here and there, all blocks are pieced together!  They are all on my design wall and in the order of which I have started to piece the rows (on the diagonal).

Here is a before photo of the last two blocks needing piecing.

Last 2 blocks all arranged and ready for piecing.


Here is the after photo.  Yea!  Finally, all blocks pieced.

Last 2 blocks pieced neat and tidy.


After rearranging the blocks, I am now piecing them to the alternate blocks.  I am assembling the rows on the diagonal:


I must admit that I began to tire of piecing the individual blocks and had to nudge myself.  Now while I am assembling the rows, it is great fun.

My overall design wall progress this week:


More Design Walls are featured at Patchwork Times hosted by Judy.


Monday, October 7, 2013

Design Wall Monday

This week I am in good company!  Just like Judy at Patchwork Times, I also have only two blocks to complete for my design wall quilt.  Uh.....I'm not counting the one that is in progress on the machine.


Judy promises to have her two blocks completed today.  I'm not so sure if I can finish my blocks today, but I do promise that they will be pieced by next week's Design Wall Monday.


Tuesday, October 1, 2013

Quilt In Progress

Jill in Michigan, the Great Lakes State, USA

This week I am squeezing sewing time in the morning (first things first) in order to work (only 1-2 blocks per day) on piecing together the last six unfinished blocks on my current quilt.  It will be a scrap-style quilt made of brown and pink reproduction fabrics from the Civil War era. 


I contemplated setting the blocks traditional, but I prefer the above set on point:


I started out leisurely hand piecing, but now I am machine piecing.  I will hand quilt it and am anxious to start on the actual quilting process.


It's amazing the difference how nice fabric pieces look when pieced together as you can see below:


Please stop by Celebrate Hand Quilting hosted by Caron Mosey to see other quilts in progress.


Monday, September 30, 2013

Design Wall Monday

Slight progress made on my Design Wall this past week.  My excuse for slow work is that Michigan has been having great early Fall weather and time has been spent fall gardening.

However, two blocks have been pieced.  I have started to play with borders which I am anxious to start. Note the color of narrow strips looks more yellow in this image than it does on design wall.


Stop by Judy's Patchwork Times to see more quilts in progress on their design walls!


Monday, September 23, 2013

On My Design Wall

Thank you to Judy for hosting Design Wall Mondays at Patchwork Times.  This week I am able to show my progress on my design wall.


During this past week, I cut out some more pieces for my remaining patches.  I am trying to have a true scrap quilt per NQA entry requirements (75 different fabrics).

Below is how I am playing with fabrics on my design wall.  A few blocks need to be pieced and a few need to be tweaked.


I've been playing and moving around scraps this past week.  Now I can start piecing them into blocks.

Had it not been for my design wall, I would not have seen the overall affect nor ever been able to count up to 75 fabrics. LOL! After my tweaks and using some of my less desirable fabrics, the main body will have 76 different fabrics.

My border fabrics will add more prints.

Monday, September 16, 2013

Jill's Sewing Museum


My "old sewing stuff" has now been upgraded to my "Sewing Museum."  It includes a store display box for the needles and an old chic (slightly shabby) sewing tin that belonged to my mother-in-law.


I have two small framed pieces that relate to sewing:
  1. A lovely petit-point framed picture.  The workmanship is very finely done on mesh.  Based on the paper backing on frame and original price sticker, I estimate this to be from the 1940s.  
  2. The second framed piece is a snapshot photo of ladies having a "bed turning of quilts."  The photo is dated 1956.  It is hard to view, but all the ladies are dressed up (including pearls) for the bed turning.  This was a gift from a dear friend who matted the photo on vintage quilt fabric and then framed it.  How clever is that?


Just this past weekend I came across the above "portable" Singer 99K sewing machine at a local estate sale.  It's similar in size to a Featherweight, but much much heavier.  According to serial number, it was made 1955ish. I'm still grateful to have found this treasure as the price was only $25!  My hunt for a reasonably priced Featherweight continues.


Part of my 'lil sewing museum are some of my antique quilts that have been loving stitched by previous generations.

This post was inspired by Beth at Love Laugh Quilt.  Check out others' older sewing items at Beth's innovative linky party entitled"Sewing Museum Linky Party."  Join the party and share some of your 'museum' pieces.  We all can learn.